Marketing & IT Specialist

Category: Tech Tips with Dot (Page 2 of 3)

How to Solve Common ADA Issues

Within the last decade, ADA has become more and more prominent, especially with each new advancement that technology has. In this blog post, I will explain ADA, why we fix ADA issues, and some common issues that anyone can fix. Hopefully, this will enlighten more people to start taking action and make ADA issues disappear from their websites, allowing more people to join their audience.

What is ADA?

What-is-Accessibility

Photo Credits: Walsworth

ADA stands for Americans Disabilities Act, an act that was put in place to help those with Disabilities have the same access to everything that the average American has access to. The ADA laws cover many aspects of life, but there are some laws specifically for technology, even more specifically for websites and documents posted online.  These laws range in things you must do and things you should do to make life easier for those with disabilities.

Why make everything ADA compliant?
Why-Accessibility

Photo Credits: Final Site

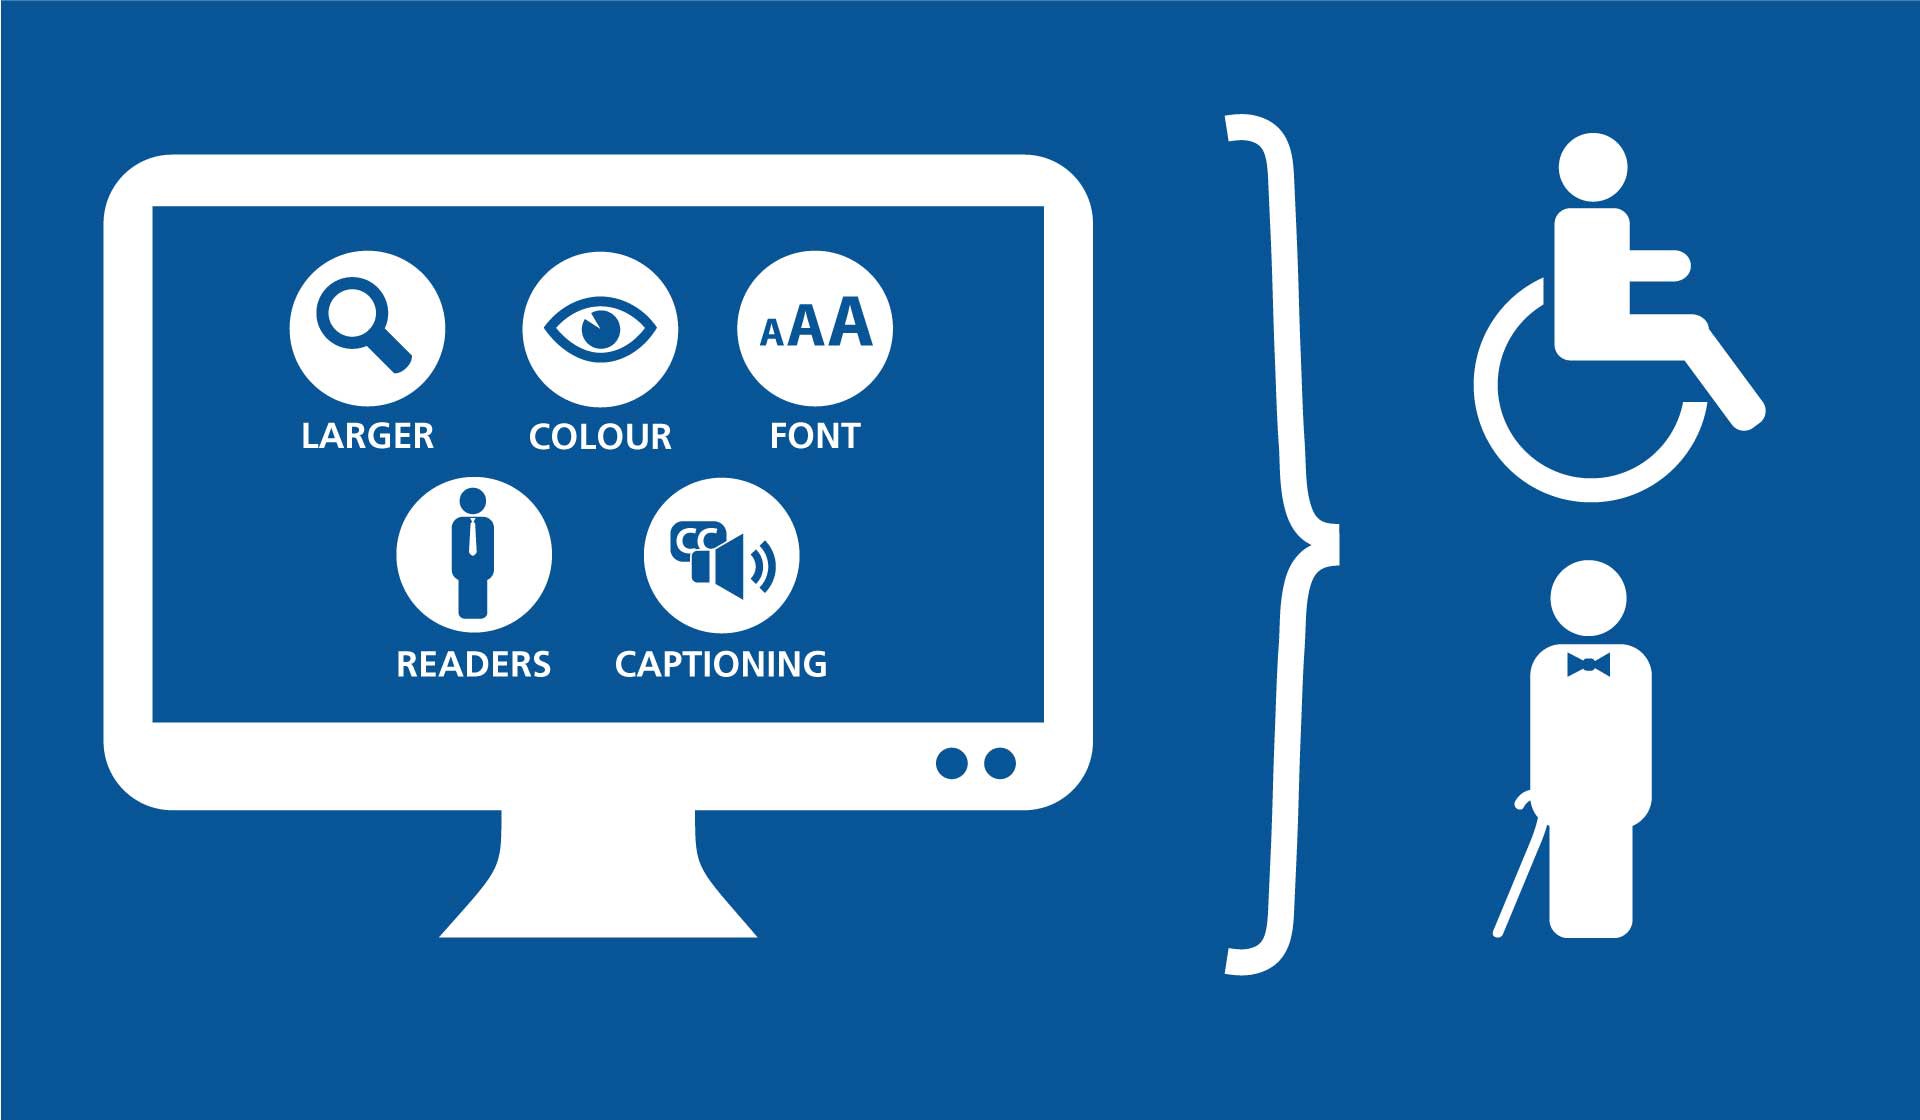
Let me ask you a question. Have you ever tried using a Screen Reader? I have. Let me be the first one to tell you that technology has come a long way, but Screen Readers have not. It is like you are still using Siri’s forgotten cousin, Voice Control’s younger brother. It has definitely improved leaps and bounds from when it started, but it is still a pain to use. After having to use a Screen Reader for a full day to understand one of the reasons why I need to fix ADA issues for my work, I stopped complaining about having to fix the issues. Now, I only complain about there being too many for our website, that we need to decrease these numbers fast because these issues are affecting a lot of people (1.5 billion to be exact).

Now, those who use Screen Readers are not the only ones being affected by ADA issues. There are a multitude of Disabilities out there, and the ADA laws cover for all of them, allowing them to have access to the same material that you and me have access to. By having less ADA issues on your site, the higher the chance that someone with a Disability will be able to utilize your site and understand what you are talking about.

Common ADA Issues

Why-Accessibility

Photo Credits: Galapagos Marketing

There are a number of programs that have been developed that help look over your site and tell you what problems you have relating to ADA. Here are the more common issues that you can fix without having to go through any coding:

Alternative Text

When you are using a Screen Reader, they cannot show their user a picture, most of the time because that user would not be able to see it anyways. A way to fix this issue is by adding “Alternate Text” or “Descriptive Text” to each and every one of your pictures. All you need to do is click “Edit Picture” and add a description of what the picture is. An example would be the featured picture on this page. Its’ alternate text would be: “Document titled ADA-Americans with Disabilities Act with a pen and glasses on top.” This explains what the picture is and allows everyone to understand what we are trying to show in this picture.

Headings

Structure is a big thing in ADA. When people are using Screen Readers or other computer screen assistants, they rely on the structure of the page to give their users quick and assessable ways to navigate the page. If the page is not in order, it gets confusing for the users. The best way to fix this issue is by keeping your headings in order: use H1 only for your title (there should only be one H1 heading per page), then any headings after that need to follow the chronological order of H2, H3, H4, etc. If you jump from H1 to H3, the readers get confused, because they are looking for H2. Do not use the headings as a way to format your text. Use your Bold, Italizize, and coloring for that.

Underlining

With one of the latests laws, underlining was chosen as a way to indicate hyperlinks, as well as color and hover. By underlining something, a Screen Reader will jump to that as if it was an important link the user should be aware of. If it is not a link, then it will confuse the user, thinking it is a broken link and that they are missing something crucial. ONLY use underlining when dealing with links, nothing else.

Misspellings and Broken Links

Now this might seem like common sense and shouldn’t really fall under ADA, but it does, big time. If your site is riddled with mistakes such as misspellings and broken links, it will become harder for those with disabilities to access your content correctly. Screen Readers are improving, but not fast enough to where it is able to warn its users prior to a broken link that that link doesn’t work any more, nor is it smart enough to recognize that word is wrong, therefore making this whole sentence not make sense, confusing the user even more. These two problems cause major ones for those with assistive programs running while on the internet. Fixing these issues is super easy and quick, which makes it the better for you, because it will not only help with those who have disabilities, but it will also help keep your website current and information updated for all users to utilize.

Color Contrast

Another major issue that people encounter is that with color contrast. Yes, your website might look exactly how you want it to look, but white on light blue not only hurts the average user’s eyes, but it is nearly impossible for those with sensitivity to color or whom are color blind to distinguish what is being said on your page. Your best bet is to keep everything the default colors of black ink on white background until you can find colors that contrast enough. There are a number of programs you can use that will be able to help you determine how much contrast your colors have and whether they meet the standards set by the ADA laws, so it shouldn’t be long before you can make your website as colorful as before.

Links and Descriptive Text

You know those buttons you see al the time that just say “Read More?” Those buttons are not ADA compliant. Whenever you are dealing with links, the text that the links are connected to need to be descriptive. What this means is that the text needs to tell the user where the link is taking them. For example, at the bottom of this page, I have links going to previous blog posts. Each of the links are connected to the specific name of that blog post. Having hyperlinks out in the open is not ADA compliant either; Screen Readers get confused when it starts reading “https://www.” They don’t understand what that means, so they will either try to pronounce everything together, or read it letter by letter, confusing everyone involved.


These are the most common issues that appear for all types of websites. There are over 100 different types of issues for websites alone, categorized in either Level A, AA, or AAA, where A is the most important (needs to be fixed now) to AAA, which is least important (needs to be fixed, but is a minor issue). The more content you push, the more likely you will have ADA issues. It is better to fix them now rather than later, otherwise you may have a lawsuit on your hands. If you want to learn more about ADA, visit the official ADA Government website, where you can learn more about ADA and what you can do to better your website.


Check out my previous Blogs for more useful tips:

Programs You Should Run on Your Windows Computers

Programs You Should Run on Your Apple Computers

Building Your Website: Things To Know

Stay Tech Savy!

Building Your Website: Things To Know

If you are thinking about building a website, there are a couple of things you should think about first. If you are able to confidently answer all the following questions with difinitive answers you aren’t thinking of changing any time soon, then you are more than ready to start your website.

1. What will my Website be about?

What-is-your-website-about

Photo Credits: Adobe Stock

The first thing you need know: what are you creating a website for. Is it a business you made? Your online professional Portfolio? A blog you wanted to start? A website for another company you are working with? Once you know what will be on your website, making it becomes ten times easier, since it allows to you answer a lot of the content and format questions that come a little later. This also will help with making final decisions pertaining to the next couple of questions in this blog.

2. What Website Builder will my Website be hosted on?

Website-Builders

Photo Credits: Adobe Stock

The next thing you want to figure out is what website builder or manager you want to use in order to bring your ideas to life. There are a number of different programs out there that allow you to make a website, but the main factors will be your level of skill with technology and/or coding as well as how much you want to invest in this website. Check out my previous blog, Which Site is Best for You?, for more information about some of the major sites you can use.

3. Should I purchase a Domain?

Domain-Name

Photo Credits: Adobe Stock

Now this question should be easily answered after you have figured out number one. If this is a professional website for a company or your business, I would suggest purchasing your domain name, making it more official and giving your customers a bit more reason to trust your company and brand name. If this is a personal website or a blog, it is really dependent on your personal preferences. Some people don’t want to pay for the domain name for their blog they made for fun or for their personal portfolio that they made for fun, but others want to purchase the domain name to give their sites more credibility. Again, I suggest you purchase your domain name, but it is really all up to you and whether you are ok with a “.wordpress.com” or whatever other builder you are using name after your “official” website url.

4. How many Pages will you have?

Pages

Photo Credits: Pexels

A good thing to think about is how much content you will be putting out onto your website. When I create my websites, I first sit down with everyone involved and figure out what exactly they want to display on the website. Once they have told me everything they want, we start breaking it up into the Parent Pages, or the pages you see on the main menu, and their Child Pages, the pages you see that are part of a drop down menu under the main items. By having an idea of how many pages you will have, it gives you a better idea of how long it might take to get everything on the internet. It also allows you to consolidate your information where needbe. For example, if you have a “Contact Me” page, there is no reason to have another page that only contains a form to contact you back at. The less people have to click through on your website, the better.

5. What will your Home Page look like?

Home-Page

Photo Credits: Pexels

Many people make the mistake of wanting a ton of information right on the front page. This is a major problem that you do not want to start your website with. First of all, your Home Page is just the teaser; it is what gets people hooked to get to the inner pages. Having too much information or too much going on on this page will more than likely send people packing. A simple paragraph about your site with some links to your other pages or some pictures is more than enough. You don’t want to overwhelm people with stuff, especially if they are just wanting to learn a bit more at first.

6. Who will have access to make changes?

Users

Photo Credits: Adobe Stock

Another common problem that people have with their websites is that they give others too much access or unlimited permission to their website backend, allowing anyone with the code to get in and make major changes. I suggest only having 1, 2 people at max, having full admin rights to change everything on the backend. Everyone else doesn’t need to have access, or they can have limited access, that way you know who is changing what as well as keep changes to a minimum. This also helps when it comes to making major decisions. If only one person has the power to change things officially on the website, people can’t go back in and reverse the changes because they don’t agree with them.

7. How much time am I willing to dedicate to this website?

Time

Photo Credits: Pexels

People don’t always realize that after the website is pushed live, there is still work to be done. Websites need constant vigilance, making sure everything is properly updated and that the content is still up-to-date. This requires knowledge of everything on the website as well as time to go through everything, time that most people didn’t think they would have to dedicate to the website after it was published. Websites are like children: they constantly have to be watched and checked on to make sure they are okay and nothing is broken. If you don’t have at least two hours each week to go through your website to make sure everything is how it should be, you might want to reconsider hiring outside help or not having a website. You can also just be resigned to the fact that your website will not be very good, but for some people, that is okay with them.


Every year, more and more websites are coming out, and along side that are ways to improving your own. This short list is just that, a short list of questions to get you started with your basic website. There are most definitely plenty of other questions that most Web Developers ask prior to the creation of the website, but for beginners just wanting to see if they should be making a website, this list will suffice for the starting point.

MoonFruit

Photo Credits: MoonFruit

If you want a few more pointers, Moonfruit wrote an awesome blog that delves a bit further than I do when wanting to build a website. Check them out and then leave me a comment below on other questions you found yourself asking when starting your own website.


Check out my previous Blogs for more useful tips:

Cmd + Help!

Programs You Should Run on Your Windows Computers

Programs You Should Run on Your Apple Computers

Stay Tech Savy!

Programs You Should Run on Your Apple Computers

Just like anything else, Apple computers are in a completely different world compared to Microsoft products. That being said, the previous blog post telling you what programs you should run to help your computer run faster will not be on your Mac. Here, I will tell you of a few ways to help make your Apple computer run faster and clean up a bit of space on your hard drive to keep it running smoothly.

Disk Utility

Disk-Utility

Photo Credits: MacWorld

Disk Utility is a program on your Mac, which has multiple functions it can perform, but we will be focusing mainly on its ability to erase, format or manage internal disks and external storage devices in this blog. If you are having a variety of problems with your computer (i.e. it won’t start up, you think you have a corrupted file, your apps are quitting unexpectedly), then Disk Utility is one of the first programs you need to run to see if you can fix it.

Disk Utility can be found by going to Spotlight Search, and typing in “Disk Utility.” Once there, make sure you are clicked on the correct drive, then run “First Aid.” It might take a while for the program to go through everything and resolve the problem, but 90% of the time, Disk Utility will be able to find the problem and fix it.

Update macOS

macOS

Photo Credits: WorldVectorLogo

This is very similar to Windows Update; even if you have automatic updates on, checking to make sure you have the latest and greatest in your Operating System never hurts. Especially with Apple, if you have an older macOS, it will start messing with your other applications and prevent you from using your computer to the fullest extent.

Going to your App Store and making sure that your system is up to date and all other apps are updated as well will keep your computer running smoothly and prevent any crashes that may have happened otherwise. It will also allow you to continue getting all the newest updated for all other apps, making your computer the most updated and with the best of everything each time you update your macOS

Change Start-Up Options

Start-Up-Options

Photo Credits: MacWorld

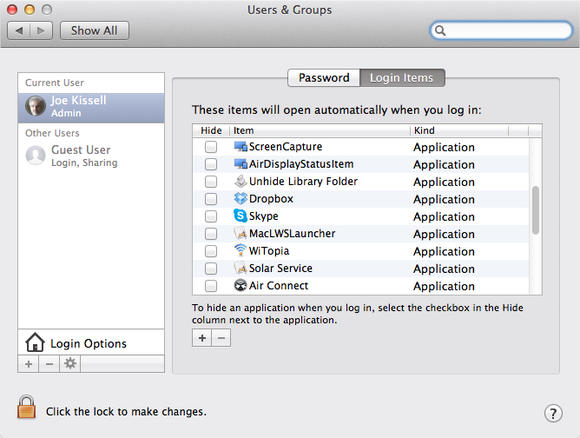
If your Mac is running slower than usual, it might have something to do with what opens automatically when you turn on your system and log in, or in other terms, your Start-Up Programs. Your computer starts to get to know you better the more you use it, asking you questions on whether you want this app or specific page to open every time you log into your system. The more programs that you have under Start-ups, the slower your computer becomes.

To edit your Start-up options, go to System Preferences, then Users & Groups. From there, choose your specific username and unclick the programs you don’t want to run every time you are logged in, or click on the currently disabled programs that you want to see more of.

Clean up Disk Hard Drives – CleanMyMac3

CleanMyMac3

Photo Credits: CleanMyMac

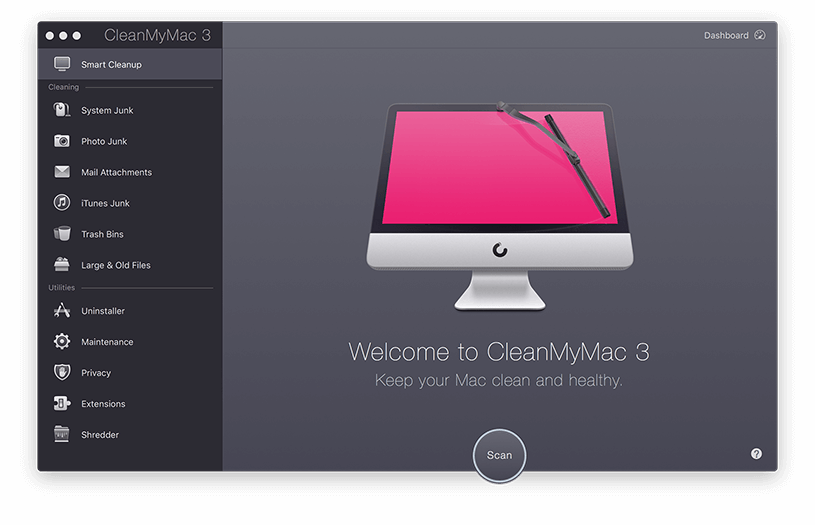
You have heard the phrase “there is an apps for everything,” right? Well they are not wrong. One of the apps that I use at one of my places of work, we use this app called CleanMyMac3. This program goes through and cleans up your computer, acting like Disk Cleanup combined with Disk Defragmenter from Windows in a way due to its vast capabilities.

With this program, you are able to clean up your hard drives of unnecessary files and documents that have been clogging up your computer. You are also able to run a program called “Fix Permissions,” which allows the programs to run through all the links and shortcuts on your computer to make sure they are working correctly, fixing them where there are issues. You do not need to download this program to clean up your Hard Drives, but it will make your job a whole lot faster and take the weight off your shoulders about deleting something essential to the functionality of your computer.


There are a lot of other things you can do to make your Mac run faster, but these ways are definitely the top ones I frequently use when updating the computers at my work. If you want more ways to make your Mac run faster, Business Insider wrote a great article on a few more ways you can go about doing it.


Check out my previous Blogs for more useful tips:

Ctrl + Help!

Cmd + Help!

Programs You Should Run on Your Windows Computers

Stay Tech Savy!

Programs You Should Run on Your Windows Computers

People tend to forget that their computer, just like their phone, can get over crowded. They typically don’t know about the programs built into the computer’s system that are meant to help keep your system fast, clean and up-to-date. The following are programs that the Windows system has that should be run normally to keep your entire computer working like you just got it:

Disk Cleanup

Disk-Cleanup

Disk Cleanup after being Run

Disk Cleanup searches your entire computer for files and documents that are unnecessary or are backups that your computer made that are no longer needed. It helps free up a lot of space by deleting these files for good off your computer. Don’t worry, these files are not necessary for you to keep on doing what you have been doing, nor will it delete files that you are using.

The main things it deletes are backups, old Windows updates, and anything in the Recycling bin. You can run this program by going to your search bar and typing in “Disk.” It will run the initial program and another dialog box will pop up, where you should select all the check boxes it gives you. Next, you will want to click on the button on the bottom left side of the dialog box named “.” After it runs again, make sure all check boxes are selected and then select “OK;” it’ll ask you to double check that this is what you want, and it is, so make sure to click yes again. This program should be run at least twice a month to keep your system running smoothly, but at the very least, once every other month.

This is one of the main ways to help make your system go faster, but it is best used right before this next program, Defragment and Optimize Drives.

Defragment and Optimize Drives

Defragment-and-Optimize-Disks

Disk Defragmentor after Analyze being Run

After you run Disk Cleanup, files all over your disk drive will be removed to help clean up some clutter. The problem with that: there are empty spaces all over your drive that takes the computer time to process that there are no files there to look at. The solution to that is Defragmenter. Think of it this way: you have a cake that you cut up, but people take pieces from all over, the center, the sides, and the in-betweens. Now it is harder for you to see how much is left because everything is spread out. The same goes with a disk. If you are searching for something, it takes the computer longer to find it because it has to search all these empty places too.

With this program, the system finds all the parts that has valid data and moves it closer together into the middle, allowing the system to only go through files that have content rather than everything. You can run this program by going to your search bar and typing in “Defrag.” Be sure to pick the option that has colorful little boxes next to it. A dialog box will open that will list your drives and two options, Analyze and Optimize. You want to Analyze all of your drives first to see if any need Optimization. Once they have been analyzed, you will see a percentage of that disk that is fragmented; anything over 2% must be optimized, but I run it on anything over 0%. This program does take a while since it is looking through all of your system files and determining where in line to place everything to make your system the fastest it can be, but it will be worth it! This system has the option where you can let it run by itself on a weekly basis, but I suggest you go in and manually check it at least once a month.

Windows Update

Windows-Update

Windows Update Screen

Even if you have automatic updates on, it isn’t good enough. Windows is constantly sending out updates for its programs to help with any bugs they have found or any vulnerabilities that were made aware to them after the fact. With automatic update, some of these pushed updated will be downloaded immediately, and some a few weeks later. By checking your Windows Update frequently, you ensure that your system is running the newest and best programs possible. You also can lay to rest that it is the most updated, therefore the most secure at this moment in time. It isn’t 100% hacker proof, but it was a lot better than your previous version.

For this program, you will need to go to your “Settings” app, where you will scroll down to “Update & Security.” There, you will click on “Check for Updates.” Depending on when the last time you did this was, it can take a while for the system to find all the new updates and actually download them. I suggest you plug in your computer and make sure it doesn’t fall asleep any time soon. Once it has found everything, make sure to download it all and then restart your computer when needed. I also suggest restarting your computer once more after all downloads are completed, just to be sure that you have a completely updated computer. This should be done at least once a month, if not once a week.

Windows Defender

Windows-Defender

Front page of Windows Defender and all its’ Modules

The last program you should be running constantly in the background is Windows Defender. Now, I don’t care how much you paid for that fancy Anti-Malware system or your overpriced spam blocker, no program is better at keeping  your computer safe than Windows Defender. An added bonus: it’s free. When you purchase and install any other systems though, they override Windows Defender, blocking it from doing its job and preventing you from turning it back on. This is not good. Windows Defender is the best program you can have for your Windows Computer to keep it protected. I suggest you get rid of whatever program you are using and turn it back on ASAP.

You can find Windows Defender right underneath our Windows Update tab in the “Settings” app. Once on that tab, it will give you a button redirecting you to Windows Defender, opening up a new dialog box. There, you will have a few options to choose from. Now, if nothing needs to be done, it’ll tell you under each module it has, but you should always double check the Virus & Threat Protection Module. All you have to do is click on the module, press “Scan Now,” and let Defender take care of the rest. Depending on how many files are on your computer, it might take some time, but if it finds any threats, it will eliminate them before any harm can come to your computer. This program should be run at least once every other month, if not once a month. It will run in the background of your computer every time you turn it on, which is why you won’t need to go in and check on it repeatedly. It will also notify you if it thinks that your computer has gone too long without a scan.


My next blog will contain the same type of programs that you should run if you own a Mac computer. Macs are completely different from Windows computers, and therefore do not have the same programs, nor same needs. I will explain what programs that have been built in to help fix any Mac problems as well as what to expect with maintenance.


Check out my previous Blogs for more useful tips:

Which Site is Best for You?

Ctrl + Help!

Cmd + Help!

Stay Tech Savy!

Cmd + Help!

Apple Logo

Photo Credits: Apple Corporation

Recently, I blogged about short cuts you can use with a Windows Computer. Now, just like with phones, not everyone owns the same operating system for their computers. This blog will contain short cuts for all those Apple iOS users to help make their lives just a tad bit easier. It will be a list of short cuts that I have learned and used throughout my time as a Technology worker that have aided in making my work go faster.

General Apple Short Cuts:

  • Command + X – Cut the selected item.
  • Command + C – Copy the selected item.
  • Command + V – Paste the contents of the Clipboard.
  • Command + Z – Undo the previous command.
  • Command + A – Select All items.
  • Command + B – Boldface the selected text, or turn boldfacing on or off.
  • Command + I – Italicize the selected text, or turn italics on or off.
  • Command + K – Add a web link.
  • Command + U – Underline the selected text, or turn underlining on or off.
  • Command + F – Find items in a document or open a Find window.
  • Command + G – Find the next occurrence of the item previously found.
  • Shift + Command + G –  Find the previous occurrence of the item found.
  • Command + H – Hide the windows of the front app.
  • Option + Command + H – View the front app, but hide all other apps.
  • Command + M – Minimize the front window to the Dock.
  • Command + O – Open the selected item.
  • Command + P –  Print the current document.
  • Command + S – Save the current document.
  • Command + T – Open a new tab.
  • Command + W – Close the front window.
  • Option + Command + W –  Close all windows of the app.
  • Option + Command + Esc – Force quit an app.
  • Command + Space bar: Show or hide the Spotlight search field.
  • Control + Command + Space bar – Show the Character Viewer, from which you can choose emoji and other symbols.
  • Control + Command + F – Use the app in full screen.
  • Space bar – Use Quick Look to preview the selected item.
  • Command + Tab – Switch to the next most recently used app.
  • Shift + Command + 3 – Take a screenshot of the entire screen.

Safari Short Cuts:

  • Arrow Keys – Scroll up, down, left, or right.
  • Option + Arrow Key – Scroll in larger increments.
  • Page Down / Space Bar – Scroll down a screen.
  • Page Up / Shift + Space Bar – Scroll up a screen.
  • Command + Up Arrow / Home – Scroll to the top-left of Page
  • Command + Down Arrow / End – Scroll to the bottom-left corner of page.
  • Tab – Highlight the next item on a webpage.
  • Shift + Command + \ – Show all tabs.
  • Command + Click a Link – Open a page in a new tab.
  • Command + 1 to Command + 9 – Select one of your first nine tabs.
  • Shift + Command + T – Reopen the last tab or window you closed.
  • Command + Home – Go to your homepage.
  • Esc – While typing in Smart Search, restore the current webpage address.
  • Esc – Close Reader.
  • Esc – Exit full-screen view.
  • Command + Plus Sign (+) – Zoom in website content.
  • Command + Minus Sign (-) – Zoom out website content.

In my next two blogs, I will help you understand different programs that come on your Windows and Apple Computers that help keep it up-to-date as well as running fast. I will also give you tips on when to run programs as well as why you should.

iOS Logo

Photo Credits: Apple Corporation

Though it is hard to believe, this doesn’t even scratch the surface of the different short cuts available. Check out Apple’s official page on short cuts to see if there are ones that you would be able to use on a regular basis and then comment them below so I can add them to my list!


Check out my previous Blogs for more useful tips:

5 Simple Steps to Keep Your Phone Running Healthy

Which Site is Best for You?

Ctrl + Help!

Stay Tech Savy!

« Older posts Newer posts »

© 2024 Katrina (Dot) Morin

Theme by Anders NorenUp ↑